
How Casualties: Unknown Mood responds to Trauma
The community documentation distinguishes changes that drift toward zero from penalties that apply while a condition persists. Good food and friendly survivor interactions can help. Trauma, sickness, wetness and low blood volume can keep the current reading down.
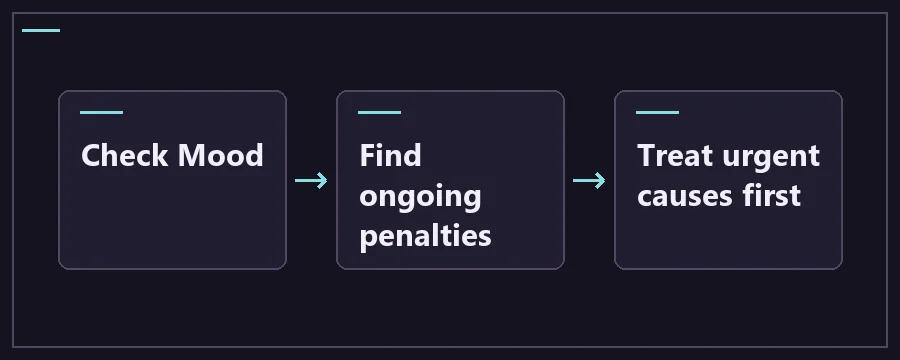
Recover from low Mood before descending
Get out of immediate danger and correct the urgent physical cause. Low Mood increases energy drain and can make item interactions fail. Rest if the spot is safe, use food or a friendly interaction you can afford, then recheck Mood and the original physical reading.
Mood changes by cause, duration and recovery
The meter runs from −100 to +100. The community mechanics reference distinguishes a lasting component that drifts back toward zero from a temporary contribution that depends on an active condition. A player can have both from the same event. Drinking may clear a thirst penalty while the longer-lived effect of going without water takes more time to fade.
The documented drift for the lasting component is 0.45 points per in-game minute toward zero when positive and 0.60 when negative. These are recovery rates for the component, rather than fixed point changes for individual events. Compare the meter before and after dealing with one cause if you want to see which penalty mattered in your run.
Scroll the table for more columns.
| Trigger | Direction and amount | How long it lasts | What to check or change |
|---|---|---|---|
| Injury and pain | Pain and some injury conditions can lower Mood. The size depends on the condition. | Active penalties last with the condition. A lasting change can fade separately. | Check pain, bleeding and blood volume. Treat the urgent injury first and compare the meter afterward. |
| Hunger and thirst | Reference lists temporary penalties below 40 for the corresponding reading. | While the reading is low. A longer shortage can also leave a lasting effect. | Check the readings even if there is no warning icon. Eat or drink what your character can use. |
| Dark caves | No fixed darkness deduction in the documented Mood influences. | Depends on other conditions you can actually identify. | Get light and safe footing, then check for pain, thirst, cold or wetness before concluding what lowered Mood. |
| Finding a corpse or losing a teammate | The solo reference lists encountering a corpse as a negative event. It gives no shared value for teammate death. | An encounter can leave a lasting change. Its effect can be weaker after repeated encounters. | Check the solo meter and the co-op mod’s own rules separately. Find shelter and address ongoing penalties. |
| Medicine and withdrawal | Some medicines can improve current Mood. Withdrawal and some medicine states can lower it. | Depends on the active effect and its end condition. | Read the in-game effect before repeating an item interaction. Check whether the original pain or shortage is still present. |
| Trauma | Temporary negative influence on the meter. | While Trauma is active. Other penalties can remain afterward. | Make the immediate area safe. Compare the Trauma status and Mood separately before choosing what to address next. |
| Food, rest and friendly survivors | Suitable food, sleep and some friendly interactions can improve Mood. | The lasting component trends toward zero over time. | Use supplies that also solve a real shortage, and rest only from a safe position. |
Tell Trauma apart from the Mood meter
Trauma names one contributing condition. Mood is the combined happiness reading you use to assess the run. When Trauma goes away, pain, thirst, sickness or a lingering negative change may still keep Mood below zero. When a good meal improves the meter during Trauma, the recent improvement and the remaining Trauma effect can both be real.
Start from the health panel rather than choosing a treatment from the meter alone. Check the current threat and anything still getting worse. Then compare the individual readings and choose a safe place to stop. Low Mood can make item interactions unreliable, so if an action fails, check that your character still has the item before you try it again.
Energy matters during recovery. The community reference describes passive drain increasing as the meter falls below zero, up to twice the baseline at −100. Change to a shorter travel leg when energy drops more quickly than you expected and make sure the next shelf gives you room to rest. In a wet or cold area, look for shelter before settling in.
Casualties: Unknown Mood FAQ
Why does Mood stay low after Trauma disappears?
Check the remaining conditions in the health panel. Pain, thirst, low blood volume or wetness can still weigh on the current reading. Even after the temporary causes clear, a negative change from a previous event may be drifting back toward zero. Compare Mood again after a safe stop and deal with whichever physical reading is still getting worse before using another item.
Does darkness lower Mood by a fixed amount?
The documented list of Mood influences does not assign darkness a flat deduction. Darkness still changes which shelf is safe and whether you can reach food or treatment. Find usable light, move to safe ground and compare the current causes you can read. Pain or wetness from an unseen drop can explain a change that first looked like a darkness penalty.
Does a teammate dying always decrease Mood?
Solo documentation describes a negative effect from seeing a corpse. A specific multiplayer rule or teammate death effect depends on the mod and version, and these notes do not establish a universal number. Check what you actually saw in the game and compare other active penalties before using the meter to diagnose a co-op event.
Which reading matters for Last Stand?
Last Stand uses an earlier Mood sample, roughly nine to ten in-game minutes before the roll. The current meter is useful for deciding what to do right now. It does not tell you the value used by that roll. Stable eating, treatment and shelter decisions earlier in the descent give you more room to recover when the route becomes difficult.
Why did my hunger icon show up late at low Mood?
The community notes describe lower Mood shifting the threshold for hunger warnings. Check the food reading directly before a long drop or a barren stretch even when the bar is clear. If you are playing unchipped and have fewer readings, build a habit of checking food at reliable stops rather than waiting for the icon to appear.
Why does picking up or treating an item sometimes fail?
Negative Mood can make some in-game item actions fail. Read the prompt and inspect your hand or inventory after the action. From safe footing, check for conditions that are still driving Mood down. One failed action can look like a missing input, so verify the actual state before spending a second item or changing an otherwise useful setup.
How do I recover Mood without relying on medicine?
Start with the condition you can change safely. Treat ongoing injuries, find a drink or eat a suitable food, and get out of persistent cold or wetness. A friendly survivor or a sheltered rest can help when available. Watch what the meter does after dealing with the urgent shortage so you can distinguish an active penalty from a longer-lived change.
Where can I check what a specific warning icon means?
Use the status icon table to identify the tooltip and its associated reading. Then return to the Mood guide when you need to understand why happiness changed or why a penalty has lasted. This split is useful when several indicators appear after one injury and each one points to a different part of the panel.