
When Casualties: Unknown Last Stand triggers
Ordinary runs roll once, pass or fail. With infinite Last Stand enabled, success can allow another roll later, but failure still spends the chance. A hit that drops brain health straight to zero can bypass the roll.
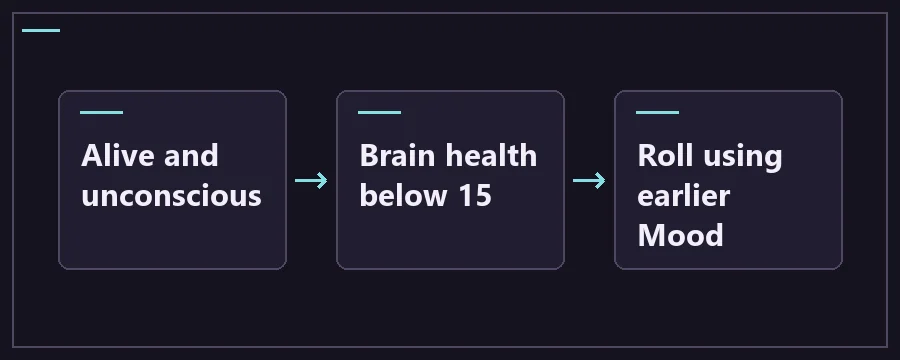
How the Last Stand timer and Mood roll work
The documented implementation stores ten Mood samples and shifts them once per in-game minute. When the trigger fires, it uses the oldest sample. The nine-to-ten-minute lookback explains why raising Mood moments before an injury may not help that roll. The chance curve uses the eligible sample rather than a simple average or the value you see right before blacking out.
An earlier Mood of 0 gives about a one-in-five chance in the community curve. At +10 it is about one in two. At roughly +70 the curve reaches 100% for an eligible trigger. Check the trigger first when interpreting these numbers. The game can skip the roll if a single hit reduces brain health to zero.
Scroll the table for more columns.
| Event | What the reference describes | What it answers |
|---|---|---|
| Trigger | Alive, unconscious and brain health between zero and 15. | Why some deaths never reach a roll. |
| Mood sample | Roughly 9–10 in-game minutes before the trigger. | Why the current happiness meter can be misleading. |
| Successful roll | Brief blackout, then a fade back as control returns. | Why you should wait for the cave and controls to return. |
| After recovery | Community reference records five minutes of increased adrenaline. | Why temporary recovery can feel stronger than later movement. |
What happens if the Last Stand roll fails?
In a regular run, you lose the opportunity for another roll. The character receives none of the recovery and the current lethal condition can finish the run. The documented cost of the failed roll is that survival chance. Infinite Last Stand only preserves the opportunity after a success. Keep track of whether you saw the recovery sequence. Leaving a dangerous spot without blacking out is different from making the Last Stand roll. Use the current health readings and the route in front of you when deciding what to do next.
Recover after the blackout
When you can move, use the nearest safe shelf. The reference describes partial repairs to damaged limbs, reduced bleeding, restored energy and improvements to several vital readings. Read the body diagram again, because the problem that caused the blackout can still be nearby. Check your light and movement before continuing. A restored stamina bar can hide how unsafe a landing or submerged route still is.
Use the breathing room to restore your usual supplies. Put light in hand, look for ongoing bleeding and test movement on flat ground. If you are unsure what a remaining warning means, open its tooltip. Once you have a stable reading and can see the route, decide whether to head back for supplies or continue.
Check the two moments separately: first the recovery animation, then the minute you need to get clear of the problem. While the screen is dark, you cannot reliably pick a landing. After you regain control, check the ledge and settle into a safe position. The game can restore energy and various readings while your surroundings still require the same caution as before.
The community breakdown lists brain health returning to 75–90%, blood volume set to 3.75 L and internal and limb bleeding reduced by 95%. Oxygen is briefly forced to 100%. Use the breathing room to check whether bleeding has actually stopped, whether you can climb and whether the environment is still causing injury. The first reading during the recovery effect may change once you are back in control, so check it again from safe footing.
If you are trying to learn when Last Stand triggered, note the run setting, preceding injury, blackout and follow-up warnings. Compare those observations with the trigger before assuming the Mood percentage tells the story. A missed trigger, a failed roll and a spent chance can look similar once the run ends. The order of events is what helps distinguish them.
Last Stand questions
Does every lethal hit trigger Last Stand?
The character needs to be unconscious and alive with brain health below 15. A hit that reaches zero directly can miss the window. The community source mentions head hits from some traps as examples. A run can also fail the random roll after meeting the conditions. Set up the descent to avoid both cases instead of relying on the roll.
Which Mood reading is used?
The game uses a stored happiness sample from around nine to ten in-game minutes back. Opening the health panel shows the current meter, which can be very different. Watch longer stretches of pain, thirst or low Mood before you take a risky route. Handling the underlying condition earlier helps more than trying to change the meter at the last instant.
Is Last Stand guaranteed at high Mood?
The documented curve reaches 100% around +70 for an eligible sample. The character still needs to meet the trigger requirements and have a roll available. A run that skipped the trigger or already spent its permitted roll will behave differently regardless of the current meter. Check the run setting and how the injury happened before interpreting the status.
Can a run have two successful Last Stands?
Ordinary runs get one roll total. With the Infinite Last Stand run setting, success can make another future roll possible. Failure still spends the chance. Treat the setting as a change to repeat eligibility. Recover and leave the hazard before worrying about how many times the effect could trigger during an extended run.
How long should I wait through the black screen?
The community reference describes about 6.7 seconds of blackout followed by a fade back over roughly four seconds, with audio returning gradually. Let the sequence finish before acting. The longer adrenaline effect is a separate reading after that cinematic recovery. Confirm when you have usable control and can see the terrain before taking a step.
Does recovery fix every limb?
The effect improves several readings and reduces bleeding, but the amount and what remains matter to your next move. Inspect any injured arm or leg as soon as you reach a safe shelf. Check movement before assuming you can climb or jump as usual. Recheck the original source of harm, particularly ongoing exposure on a hazardous layer.
How do I prepare for Last Stand before attempting a hard layer?
Keep Mood and physical readings stable during earlier safe sections and plan around a route you can actually light. Use hydration, warmth and treatment when a problem first shows up. These choices make the older sample more favorable while helping you avoid the need for a roll. Keep a reserve that remains usable after a fall.
How does Last Stand differ from modded respawns?
Last Stand is a vanilla conditional recovery that can occur inside a run. A co-op mod can add its own rules for death, spectating and returning with the group. Check the host’s rules and the mod release notes for those behaviors. The timing, odds and eligibility described here apply to the documented solo mechanic.