
How Casualties: Unknown endings begin
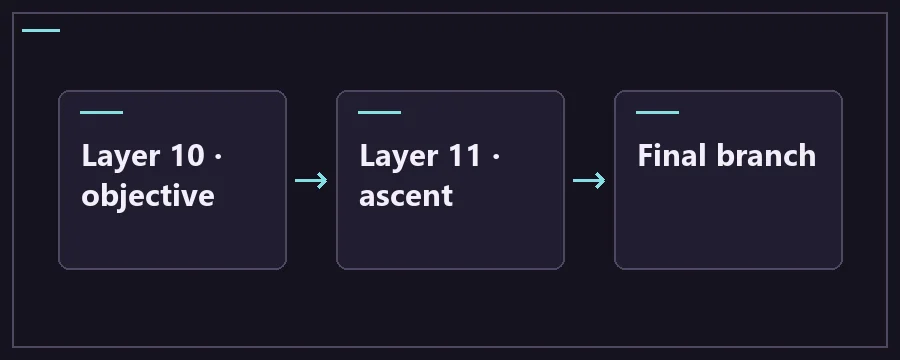
Turn Endless off before starting. In a normal run, descend to Layer 10, follow the cargo cues, complete the embedding sequence and activate the high-powered drill pod above the objective. In Endless, reaching the cargo sends you back into the cave loop instead. Check the mode now if unlocking Milky or Dune is your reason for finishing.
When the pod stops on Layer 11, climb up through Crimson Ascent. Keep any route-critical supplies you deliberately carried through the descent. Go from one visible shelf to the next and check your character’s ability to climb before trying a long move. Reaching the surface begins the ending sequence. The detailed branch checklist is below in the expandable section.
If you want a spoiler-light first finish, follow the in-game prompts after the climb. If you want a specific ending, look at its start conditions before your next run. One route has a prerequisite from a prior finish and a Layer 1 step. The important decision may already be behind you by the time you see the first surface scene.
Treat the ending route as a series of checkpoints. At the start, confirm the character and settings. Near the cargo, look for the cyan cue and the pod on its platform. At the ascent, look above you for a climbable route and confirm you still have any required item. These checks help distinguish missing setup from the ordinary sequence taking time to play.
Leave yourself room to carry any required item and still use treatment or a light without repacking. Finding the shared route for the first time can take longer than expected if you stop to investigate every object. Keep the cargo goal in view and use the pressure reading on Layer 10 to decide whether a detour is worth crossing.
Spoilers: compare the three endings and their requirements
Show route details and spoilers
Scroll the table for more columns.
| Ending | Decision and outcome |
|---|---|
| Bio-pod | At the lab, follow the scientist’s directions and take the right-hand door. Company’s Best marks the outcome. |
| Escape | Start unchipped and bring a firearm in the game. In the lab, wait for dialogue to end before starting the escape. The surgery and exit need to be completed before capture. |
| Mercenary | Finish Bio-pod or Escape in an earlier run. Start a fresh chipped run, use the scanner in Layer 1, then carry the crafted M.E.R.C. scarf to the surface. |
Escape route: lab sequence
Show route details and spoilers
After the scientist stops talking, an unchipped character can use items. Shoot the scientist in the game to trigger the escape. Follow the surgical minigame prompts in order: anesthetic, device, clamps, remove the cargo, cover the wound with the tubes, then leave. Capture during the escape can return you to the Bio-pod outcome.
Check the route at three points
After a run ends, look at the report and then at character select when an unlock is the goal. The three finishes have different final outcomes. If you got farther but never reached the expected sequence, compare the last checkpoint you saw with the cargo or ascent guide. If the surface branch was different, go over the start settings and the item requirement for the ending you wanted.
For a second finish, change the setup the branch actually requires. Read the conditions before entering the caves and verify the early step when you reach it. The common descent is still useful practice. If you play a new character on the repeat, bring light and treatment that fit their starting stats instead of assuming the first run’s supply plan carries over.
Scroll the table for more columns.
| When | What to confirm | Why it matters |
|---|---|---|
| Before starting | Normal run, correct character and intended chip setting. | Some decisions affect which branch can happen later. |
| At Layer 10 | Cargo sequence completes and the high-powered pod is usable. | A completed cargo interaction moves the ordinary route toward the final climb. |
| At Layer 11 | Any route item is in your inventory and you can still climb. | The surface sequence uses decisions made earlier in the run. |
Frequently asked questions about endings
How many endings can I reach on the full game?
There are three documented ending routes in the full Steam release. They share the same descent and climb before route-specific conditions determine the final sequence. The demo stops before those layers. If a route asks for something in an earlier run or layer, review the spoiler table before launching, since it may be too late to change at the surface.
Does getting to Layer 10 count as a finish?
Reaching the cargo is a checkpoint on the ordinary route. Complete embedding, use the drill pod to reach the final layer, climb out and resolve the ending. If you are trying to unlock the next character, see the ending through and check character select afterward. The unlock depends on who you completed the run with.
Can I finish in Endless mode?
The Endless cargo interaction loops back to Deeper Gravel Lands, bypassing the normal ascent and ending route. Choose a standard non-Endless run when a completed ending is the goal. Confirm it before descending so you do not spend the whole run gathering supplies for a surface sequence the mode will skip.
Does a death after the cargo unlock a character?
The playable roster treats an ending as a finished run. Dying before completion does not meet that requirement. Complete an ending as the Experiment for Milky, then complete one as Milky for Dune. If a slot remains locked, check the completed character and edition before repeating a whole route.
What if I arrive at Layer 11 and the pod will not move again?
The pod breaking down is part of the normal ascent. Leave it and look for a route above you. Crimson Ascent reverses the direction of progress. Recheck injuries and stored light before the next climb. If there are several possible ledges, take one you can see and that gives you space to stop before continuing.
How can I read this page without finding out the endings?
Use the shared route and the three-point checklist. They cover settings, movement and the cargo transition. Leave the marked spoiler sections closed. If a particular branch is your goal, you can open the necessary route before you start a later run. The branch table identifies which choices must be made early.
Should I bring the same loadout for every finish?
Keep the basic light, water and treatment you need to reach the cargo and climb out. A specific branch can require its own setting or item, so check that route before selecting what to carry. Confirm the important item remains in your inventory at each major checkpoint instead of discovering it is missing on the final climb.
What should I replay after completing my first ending?
Check character select for the next unlock and decide whether you want a new playable character or a different route. If you choose a new character, plan around their stats and travel needs. If you choose a new ending, check its prerequisites before leaving Layer 1. Both options start with the same cargo and ascent path later.