
Where to find Casualties: Unknown cargo and launch the pod
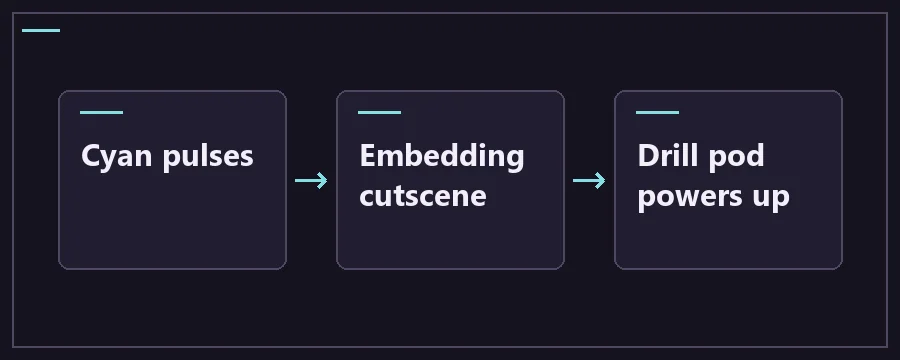
The objective glows cyan at floor level, below a platform holding a High-powered drill pod. Pulses intensify as you approach. Near the cargo, the camera draws in, movement locks and a white flash follows. In a normal run the cargo embeds itself rather than appearing as a loose inventory item.
Check the character after embedding
The community source describes an initial abdominal injury and knockdown, then passive recovery and pressure protection while the cargo is embedded. Wait for control to return and check the injury before moving to the pod.
The drill pod still will not launch
Check that the embedding sequence finished and that you are at the high-powered pod above the cargo. Electrical arcs mark a powered pod. Interact to reach Crimson Ascent and continue upward after it crashes. Endless mode loops instead of embedding. A destroyed pod has no documented replacement on this route.
Cargo and drill pod interaction states
The cargo, also known as the Blue Heart, is a single story objective. When you get close enough on foot in a normal run, it embeds in the character. The high-powered drill pod checks that state before it can take you to Crimson Ascent. There is no separate freight hold to load, so checking bag capacity or dropping ordinary tools will not power the pod.
Plan what you personally carry for the next stage. Keep light, treatment and the items required by your chosen ending accessible. A M.E.R.C. scarf is a route item you keep on your character. It does not take the place of the cargo, move into a numbered cargo slot, or require a second loading prompt.
Scroll the table for more columns.
| State | What you see | What moves forward | Next step |
|---|---|---|---|
| Before embedding | A cyan object on the chamber floor, with a pod overhead. | Ordinary items remain in your inventory. The objective has not been taken. | Stand close enough to start the sequence. |
| Embedding sequence | Camera movement, a white flash and a temporary loss of control. | The objective changes to the embedded state on the character. | Wait for movement to return and check the abdomen. |
| Ready for ascent | The powered drill pod shows electrical effects after embedding. | Your character carries the embedded cargo and any equipment still on you. | Interact with the high-powered pod above the chamber. |
| Endless loop | Approaching the cargo leads back to Deeper Gravel Lands. | The run continues through the cave loop. | Choose a normal run when your goal is an ending. |
Six checks when the cargo pod will not launch
If you are in co-op, verify the version on all machines. Casualties Together is a separate mod and its changes can affect what host and clients see. The maintainer has documented fixes for cargo visibility and pod behavior in the full-game line. Compare the exact installed builds before repeating the route as a group. A different result in solo helps isolate a mod issue.
Scroll the table for more columns.
| Symptom | What to do next |
|---|---|
| 1. The cargo sent you back to an earlier layer | Check the run mode. Endless goes back to Layer 2 instead of enabling a surface ascent. Start a non-Endless run for an ending. |
| 2. The route continues down into mantle | You may have passed the chamber. Backtrack toward stronger cyan pulses. On 1.0.1 or later, the character can comment when you miss the cargo. |
| 3. You see the Heart but the cutscene does not start | Approach it on safe footing. The reference puts the trigger within about ten tiles while standing. Recover movement before trying again if you arrived knocked down. |
| 4. You moved toward the pod before control returned | Let the embedding sequence finish. Check the character and look for the effects on the pod after you can move again. |
| 5. Your pod still looks unpowered | Identify the high-powered drill pod on the platform immediately above the cargo. Earlier drill pods and collapsed life pods serve other purposes. |
| 6. The correct pod was destroyed | The documented route has no replacement vehicle in that chamber. Confirm the damage and whether the pod is still interactable before deciding whether the run can continue. |
Get from the chamber floor to the pod platform
Use the last accessible shelf to prepare. Equip a light, check that you can still move and leave your treatment within reach. When you find the chamber, identify the low cyan object and an approach back to the upper platform. Check how you can get from one to the other before advancing. The route through the cave varies, so use the chamber and its cues rather than expecting a particular shape or coordinate.
While searching without the cargo, pressure rises with time on Layer 10. If a trap blocks the most direct opening, choose a detour that keeps the cargo cue easy to pick up again. After embedding, the references describe relief from pressure and ongoing recovery, alongside an immediate injury from the sequence. Give control time to return and make the next short move from the ground you can see.
Check your character and the pod as two separate checkpoints. If your character has regained control but you cannot see the embedded status, go back through the trigger check before blaming the vehicle. If you have the cargo and the pod is powered, check that you can reach its platform and the interaction point. Solve a blocked approach from a safe shelf before spending time on the rest of the chamber.
Do one final inventory check while the chamber still gives you a place to stop. Keep the light you can use for the upcoming climb and verify a branch item if your route needs one. The cargo is already part of the character at this point. Use the pod interaction to leave Layer 10, then reassess what you can climb when the damaged pod stops on Layer 11.
Once the pod carries you up, it breaks down on Crimson Ascent. That change is the intended transition. Look upward from your landing and clear one shelf at a time. Check that any ending item you deliberately collected is still with you before crossing the top. The cargo sequence opens the shared route to the end, while the ending branch uses choices made elsewhere in the run.
Cargo and drill pod FAQ
Do I need an empty bag slot for the cargo?
No bag slot is needed. The cargo embeds during the cutscene and shows its effects on the character. Keep the supplies you need for the climb. If you only saw it glowing from a distance and there was no sequence, return to a stable approach and get close enough to trigger it.
Do I need a battery or repair kit to power the high-powered pod?
Follow the condition the Layer 10 route uses: the cargo must be embedded. The platform pod is distinct from repairable drill pods in the early gravel layers. Confirm the cargo status and the electrical cue at the platform first, then check the troubleshooting table if the interaction still does not appear.
Can I take the standard cargo route in the demo?
The free Steam demo covers the first five layers. Layer 10, the cargo and Crimson Ascent are part of the full release. If you already arrived at the objective and it returned you to Layer 2, check your Endless setting: looping is a normal response in that mode.
Does reaching the cargo count as finishing?
The cargo is a checkpoint. In the normal route you still need to reach the pod, climb out of Crimson Ascent and complete an ending. If you are unlocking a character, complete the ending as the required playable character and check character select afterward.