
Where Casualties: Unknown Layer 10 sits in the descent
Where We Must Reach follows Geothermal Vents and ends the downward part of the standard route. Plan your last supply stop before crossing into it. You are looking for two things in one chamber: the low cyan cargo and the drill pod on the platform above it. A good approach leaves a viable way between them. After embedding, this same chamber is the way forward to Crimson Ascent.
Use the early stretch to take a reading and orient yourself. The community reference describes a brief arrival energy effect and no layer modifier in a normal run. Familiar traps return here, including turrets, sawblades, sound cannons, mines and spent fuel. Each detour should lead to a useful shelf or better view of the cyan pulses, since air pressure builds the longer you stay without the cargo.
The Blue Heart glows cyan at the bottom of its chamber. The high-powered drill pod sits on a platform above it. The source describes the cutscene starting when you stand close to the objective. If you see the pod first and the character only comments on it, make a safe route to the cargo below. Keep enough room to move between the two afterward.
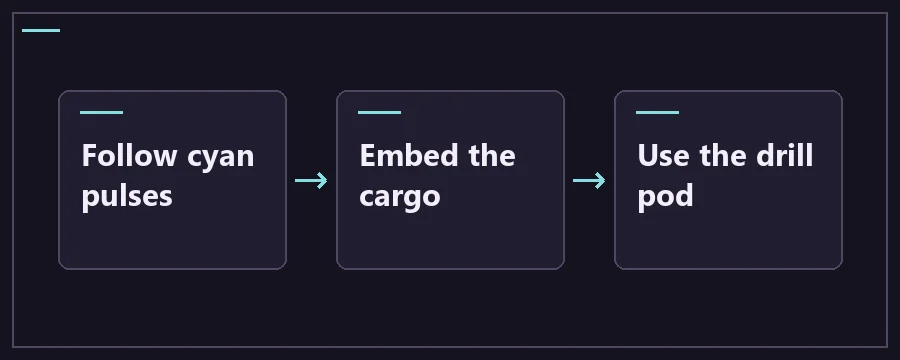
- Follow stronger cyan pulses and check floors, ceilings and walls for hazards between ledges.
- Approach the Blue Heart on safe footing. Wait through the embedding cutscene and check health after movement returns.
- Identify the high-powered drill pod above the objective. When powered after embedding, approach and interact to ascend.
- At the next layer, look upward from the broken pod. If you are playing Endless, the cargo instead loops the run to Deeper Gravel Lands.
Layer 10 hazards and supplies
Scroll the table for more columns.
| Hazard or landmark | Where to look | How to respond | What to carry |
|---|---|---|---|
| Rising air pressure | Throughout the layer while the cargo is still outside the character. | Prioritize the route toward the objective and recheck pressure after any detour. | Drink, treatment and light already at hand. |
| Landmines and spike traps | Floor tiles and the next landing. | Sweep the target shelf before you descend and check whether you can stop once you land. | A light that shows the entire footpath. |
| Turrets and ceiling turrets | Open chambers and overhead approaches. | Check the ceiling and line of sight before crossing. Look for a route that keeps cover nearby. | Enough usable movement to detour. |
| Sound cannons and spent fuel | Hazard pockets along the generated route. | Identify them from a distance and consider another approach. Check your condition after any exposure. | A usable light and accessible treatment. |
| Sawblades, coils and pistons | Tight passages and landings. | Inspect both sides of each obstacle before dropping in. Backtrack if the route gives you no place to recover. | A steady light and enough energy to turn back. |
| Missed cargo | A route that continues past the chamber toward mantle. | Turn back toward the stronger cyan cue. The bottom is not a standard transition. | A backup light for retracing the route. |
| Unpowered drill pod | Above the cargo on its platform. | Complete the normal embedding sequence below, then go back after movement returns. | A safe connection between the cargo and the platform. |
| Endless mode loop | At the Blue Heart when Endless is active. | Check the mode before planning for Crimson Ascent. Endless leads back to Layer 2. | A planned reserve for the next loop if playing Endless. |
When the cargo is missing or the Layer 10 pod does not start
If you enter a deeper mantle stretch, turn back toward the cargo cues. The community route documents no ordinary bottom transition in Where We Must Reach. The 1.0.1 notes also say the character can comment if you miss the cargo. Watch your readings on the way back and use a shelf you can see.
For a stalled departure, confirm you have finished embedding and that you are at the correct pod above the chamber. The powered pod shows electrical effects. If returning to the chamber is still possible, recheck the cues there once. The cargo guide covers the interaction and signs of successful embedding in more detail.
Layer 10 FAQ
Where is the Blue Heart on Casualties: Unknown Layer 10?
Look for cyan pulses that strengthen as you approach the cargo. The objective is low in a chamber with a high-powered drill pod on a platform above it. Terrain is generated, so work from the visible cue instead of counting a fixed number of ledges from the top. If you meet a familiar trap between you and the signal, check a shorter alternate route from a stable shelf.
How do you make the cargo embed on Layer 10?
In a standard run, move into range of the glowing cargo from usable footing. The game takes over for the embedding sequence. Let the cutscene finish before trying to leave the chamber and check your character when control comes back. If you see the pod first, you can use it as a landmark while you route to the cargo below.
Why is the drill pod on Layer 10 unpowered?
The pod waits for the cargo to be embedded. A comment when you inspect it is a cue to look for the cyan objective below. Once the sequence finishes, check the right platform again for the powered pod. If you still cannot start it, verify you are in a normal run and at the pod above the cargo rather than another structure you passed on the way down.
How do you handle rising pressure in Where We Must Reach?
Focus on progress to the objective and skip loot that requires a difficult return trip. Before leaving a safe shelf, check whether the next opening leads toward the cyan signal. If you have to bypass a trap, pick a detour that still lets you see the cue after a short move. Keep treatment and light in reach instead of stopping in the open to sort your bags.
What if you reach mantle at the bottom of Layer 10?
The layer reference describes mantle beyond the cargo and no ordinary lower exit. Turn back and inspect the area where the signal was brightest. The 1.0.1 patch also added a character comment if you miss the cargo. Use the cue to pick which branch to retrace and check your health on the safest shelf you can reach.
Does Layer 10 work differently in Endless?
Yes. Reaching the Blue Heart in Endless sends you back to Deeper Gravel Lands instead of starting the standard embedding and ascent route. If your goal is a character unlock or an ending, check that your mode is standard before beginning. If you meant to loop, plan for the extra reserves you will need after losing the chance to restock past the cargo.
Why are there so many familiar traps on Layer 10?
The layer reuses multiple trap types from earlier caves. Expect to check both the ceiling and floor as you approach the objective: a safe-looking landing can still put you in a turret’s line or next to a floor hazard. Each detour costs time under pressure. Pick a route that gives you a view of both the cargo and the way back from it.
What do you carry from Layer 10 into Crimson Ascent?
Have a usable light and enough movement to climb once the pod stops. Keep the supplies and items required by the ending you chose before starting the run. The next direction is upward, so a visible ladder of landings matters more than finding another drop. Check injuries when the embedding animation ends and again if you land hard on the last layer.